How to fit a smart shower

After 10 years of use by four adults, my bathroom was looking tired, so I decided to give it a refresh. Although our shower had served us all very well, with constant daily use, I decided it was time for an upgrade. I set about fitting a new model, and while I was at it, I decided to change the shower door and line the shower cubicle with wet wall panels.
1. Out with the old
The existing shower had served us all very well over the years, but it was time to upgrade, and I opted for an Aqualisa i System Smart dual outlet, exposed shower. I began the job by decommissioning the old digital shower, sited above the cubicle in the loft. I turned off the power and isolated the water at the spur switch, and isolated the valves on the existing digital unit.
Even though this initially looked like a simple installation, I sat and read through the instructions, researching the changes I’d have to make, and found that there were plenty.
The main controller went back into the same location as the old one, as did the isolation valves, so this was a straightforward swap. You might wonder why I bothered changing the valves. For me, a warranty is only valid if you do exactly as the instructions say, which is why I change everything.
2. Digital connection
The smart valve has cold water and hot water inlets. It’s important to know which type of system you have when ordering the shower, so you order the correct smart valve. I chose one for high pressure, but it could also be used if a combi provided hot water, and two outlets – one for the adjustable ceiling-mounted head, and one for the wall-mounted exposed controller.
This means that the smart valve sends safe and controlled, blended water through to the shower heads via another interconnecting diverter box. The diverter box simply connects directly to the smart valve outlet with a link wire for power. The great thing about the smart valve is that it can be located just about anywhere as it has a 10m range. In my case, I put it directly above the cubicle, but I could have located it in the airing cupboard or under the bath.
3. Mounting the controller
Next, I set about installing the surface-mounted controller: this was my choice – I could have gone for one below-surface. The new controller is fed via the chrome tube that houses the mixed supply (copper pipe inside) to the shower hose and head on the riser rail.
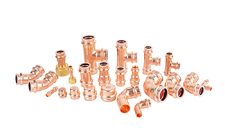
I marked out the height and moved it into position. On top is a 15mm push-fit elbow, which allowed me to connect this back to the diverter valve from the pipework.
The overhead shower outlet is a 22mm connection. I scuffed off the chrome pipe where I wanted to connect it, for a watertight seal, and directed a pipe back to the second port on the diverter valve. I sent this pipe back with a backfall from the protruding ceiling-mounted head to ensure that any residual water retained in the leg of pipework after showering didn’t constantly drip after use. Some customers will report a fault with the product if this happens.
Wiring the smart system was just a matter of plugging in the connections, following a simple diagram.
4. Test time
When commissioning, I always put on the water before the power so nothing runs dry. I removed the shower head from the hose to enable maximum flow for the test run and to clear any debris. I then checked for water tightness and powered up.
This new smart shower can save water, which is useful in the present climate. In fact, when installing a new bathroom or sanitaryware, we must always consider how to save water. Doing this can also help you meet Building Regulation Part H, water calculations.
The smart shower uses wifi and can be controlled by voice activation via the interactive app. The app allows all household members to create their own settings, track water consumption and indicative cost.
You might also like

The role of heat interface units (HIUs) in modern heat networks
How to install press-fit pipework for ACR systems